If you are a graphic designer, illustrator, or photo retoucher currently trying to execute precise bezier curves or blend complex shadows using a standard computer mouse, you are essentially trying to paint the Mona Lisa with a brick. The human wrist and hand were not evolutionarily designed to drag a heavy, flat piece of plastic across a desk to create nuanced art. For anyone serious about digital design, the transition from a mouse to a graphics tablet is not just an upgrade; it is a fundamental creative awakening.
A graphics tablet restores the natural, intuitive hand-to-eye coordination that artists have relied on for millennia. It allows you to leverage muscle memory, utilize pressure to control brush opacity and size, and work for hours without the crippling wrist pain associated with repetitive mouse clicking.
However, the market for drawing tablets has exploded over the last decade. What used to be a monopoly held by one premium brand is now a vast ecosystem of pen tablets, pen displays, standalone mobile studios, and budget-friendly alternatives. Navigating specifications like pressure sensitivity, tilt recognition, parallax, and color gamut can feel incredibly overwhelming.
Whether you are a design student buying your first tablet or a seasoned studio professional looking to upgrade your primary workstation, this comprehensive guide will demystify the technical jargon. We will explore the different types of tablets, dissect the hardware specifications that actually matter, match tablets to specific design disciplines, and teach you exactly how to choose the best graphics tablet for your unique creative workflow.
Understanding the Three Main Types of Graphics Tablets
Before looking at technical specifications, you must decide which category of tablet fits your physical workspace and budget. There are three distinct paradigms in the digital drawing world, and each requires a different type of hand-eye coordination.
Pen Tablets (Non-Screen Graphics Tablets)
Pen tablets (traditional drawing tablets) are flat, dark slates of plastic that connect to your computer. When you draw on the surface of the tablet with the stylus, your strokes appear on your computer monitor.
- The Learning Curve: Because you are drawing on the desk while looking up at your monitor, there is a disconnect between your hand and your eyes. This requires an initial adjustment period that typically takes a week or two to master.
- Pros: They are incredibly durable (almost unbreakable), highly ergonomic (you can sit back in your chair and look straight ahead, saving your neck), highly portable, and very affordable. Furthermore, your hand never blocks your view of the artwork.
- Cons: The hand-eye disconnect can be frustrating for traditional artists who are used to looking exactly where their pen touches the paper.
- Best For: Graphic designers focusing on typography, vector illustration, photo retouching, and artists on a strict budget.
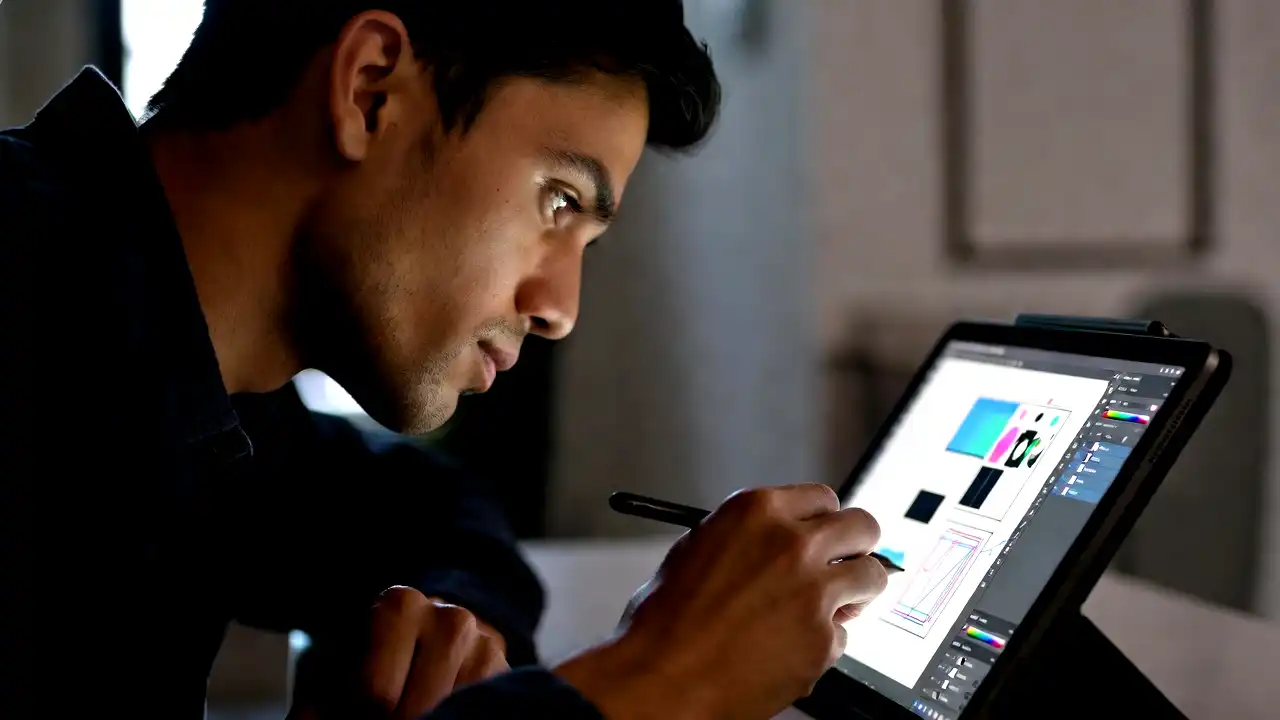
Pen Displays (Screen Tablets)
Pen displays are essentially external computer monitors with a digitizer built into the glass, allowing you to draw directly onto the screen using a stylus. You still need to plug them into a Mac or PC; they do not have their own operating systems.
- The Learning Curve: Zero. It is exactly like drawing on paper. You look directly at the tip of your pen as you draw.
- Pros: Highly intuitive, incredibly satisfying to use, and excellent for precise line art and complex digital painting. They come in sizes ranging from 12 inches to massive 32-inch studio centerpieces.
- Cons: They are significantly more expensive than non-screen tablets. Because you are hunched over looking down at a screen, they can cause neck and back strain over long periods without a proper ergonomic stand. Your hand also physically obstructs a portion of the screen while you work.
- Best For: Digital illustrators, 3D sculptors, concept artists, and traditional artists making the leap to digital.
Standalone Tablet Computers
These are full-fledged mobile computers with built-in operating systems, batteries, and touchscreens that support highly accurate styluses. The most famous examples are the Apple iPad Pro (with Apple Pencil) and the Microsoft Surface Pro.
- Pros: The ultimate in portability. You can draw on a train, in a coffee shop, or on the couch. You are not tethered to a desktop computer.
- Cons: You are limited by mobile operating systems (like iPadOS). While apps like Procreate are incredible, you may not have access to the full, uncompromised desktop versions of complex software like high-end 3D rendering engines or heavy video editing suites. They are also the most expensive option when factoring in the required computing hardware.
- Best For: Mobile creatives, traveling artists, students, and those who want an all-in-one entertainment and design device.
Key Tablet Specifications to Consider
Once you have decided on the type of tablet you want, you will be bombarded with a wall of technical numbers. Here is what those specifications actually mean for your daily design work.
Active Drawing Area vs. Overall Size
The physical footprint of a tablet is not the same as the space you can actually draw on. The “Active Area” is the responsive section of the tablet.
- Small (roughly 4×6 inches): Great for limited desk space and travel. It requires you to draw using only your wrist. This is excellent for photo retouchers making tiny adjustments but terrible for artists who draw sweeping lines using their entire arm.
- Medium (roughly 6×8 to 8×10 inches): This is the universally accepted “sweet spot” for 90% of designers. It is large enough to allow for natural, sweeping arm movements, but small enough to fit comfortably next to a keyboard.
- Large (roughly 10×15 inches and up): Reserved for artists with massive multi-monitor setups or those who naturally draw very large on giant canvases.
A Crucial Rule: You should try to match the size of your tablet to the size of your monitor. If you map a tiny 4×6 tablet to a massive 32-inch 4K monitor, a one-inch movement of your pen on the tablet will send the cursor flying halfway across the screen, making precision work impossible.
Pressure Sensitivity: How Much is Enough?
Pressure sensitivity dictates how thick or opaque your brush stroke is based on how hard you press the stylus into the tablet. A decade ago, 1024 or 2048 levels of pressure were standard. Today, the industry standard is 8192 levels of pressure sensitivity, with some newer models boasting 16,384 levels.
Do you actually need 16,000 levels? In short: no. The human hand is generally incapable of distinguishing the difference between 8192 and 16,384 levels of pressure. As long as the tablet you are buying advertises at least 4096 (or the standard 8192) levels, you will experience buttery-smooth transitions from whisper-thin hairlines to thick, bold ink strokes.
Resolution (LPI – Lines Per Inch)
LPI refers to how many digital lines fit into one physical inch of the tablet’s active area. It is the tablet equivalent of a monitor’s pixel density. Higher LPI means the tablet can detect tighter, more precise movements of the pen.
Most modern professional tablets offer an LPI of 5080. This is incredibly high and ensures that your slow, diagonal lines do not appear jagged or pixelated (a phenomenon known as the “staircase effect”).
Tracking Speed and Report Rate (RPS/PPS)
Report Rate (measured in Reports Per Second or Points Per Second) is how many times per second the tablet communicates the pen’s location to your computer.
- If the RPS is too low (under 150), you will experience “lag”—the digital line will trail slightly behind your physical pen tip, which is incredibly distracting.
- Look for a tablet with an RPS/PPS of 200 or higher (many modern tablets reach 266+). At this speed, the line appears instantaneously, exactly mimicking the real-time feedback of traditional ink on paper.
The Magic of the Stylus (Pen Technology)
The tablet is only half of the equation; the stylus you hold in your hand is arguably more intimate and important.
Battery-Free EMR vs. Battery-Powered Pens
Historically, budget tablets used pens that required AAA batteries or USB charging cables. This made the pens heavy, unbalanced, and prone to dying in the middle of a project.
Today, you should only buy a tablet that features Battery-Free EMR (Electro-Magnetic Resonance) technology. EMR pens draw power wirelessly from the tablet itself. They never need to be charged, they are lightweight, perfectly balanced, and always ready to draw. Fortunately, almost all major brands (Wacom, Huion, XP-Pen) now use EMR technology as their standard.
Tilt Recognition and Rotation
When you shade with a real graphite pencil, you tilt it on its side to use the broad edge of the lead. A tablet with Tilt Recognition (usually up to 60 degrees) mimics this mathematically. When you tilt the stylus, compatible software (like Photoshop or Corel Painter) will automatically change the shape and behavior of the digital brush to create wide, sweeping shading strokes. This is an absolute must-have feature for digital painters and concept artists.
(Note: Pen Rotation is a rarer, highly premium feature found on specific stylized pens, like the Wacom Art Pen, which detects the barrel’s rotation to turn uniquely shaped digital brushes, like a chisel-tip marker).
Pen Nibs and Surface Friction (The “Bite”)
Drawing on smooth glass feels like sliding ice across ice; it is slippery and hard to control. Good tablet manufacturers engineer a specific texture into their drawing surfaces to mimic the “bite” or friction of traditional paper.
You will also go through Pen Nibs (the replaceable plastic tips of the stylus). Different nibs offer different feels. Standard plastic nibs are smooth, while “felt” or “stroke” nibs offer more friction and a scratchier, pencil-like feel. Ensure the tablet you buy comes with replacement nibs and check if the brand offers varying nib textures for future customization.
Crucial Features for Pen Displays (Screen Tablets)
If you have decided to invest in a Pen Display, there is an entirely different set of specifications you must scrutinize, as you are essentially buying a high-end computer monitor.
Color Gamut and Accuracy
For a designer, color accuracy is not optional; it is mandatory. If you paint a vibrant red on a cheap screen with poor color reproduction, it may look muddy and brown when printed or viewed on a client’s iPhone.
Ignore standard metrics like “100% sRGB.” For professional print and digital design, you want to look at the Adobe RGB or DCI-P3 color gamut percentages.
- A good screen tablet should hit at least 85% to 90% Adobe RGB.
- Premium, studio-grade displays will hit 98% or 99% Adobe RGB, ensuring you can see the absolute maximum range of vibrant greens and cyans.
Laminated Screens and Parallax
Parallax is the visual distance between the physical tip of your pen and the digital cursor on the screen, caused by the thickness of the monitor glass. On older or cheap pen displays, this gap could be several millimeters, making it feel like you were drawing hovering slightly above your artwork.
Modern, high-quality pen displays use fully laminated screens. This manufacturing process removes the air gap between the LCD panel and the top glass. When a screen is fully laminated, parallax is effectively eliminated. The digital ink flows exactly from the absolute tip of your physical pen. Do not buy a pen display in the modern era unless it specifically states the screen is fully laminated.
Etched Glass vs. Matte Screen Protectors
To give the screen that “paper-like” friction and to reduce glare from overhead room lights, screens need a matte finish.
- Matte Screen Protectors: Cheaper tablets use a plastic film applied over the glass. While effective, they can wear down over time, get scratched, and slightly reduce the clarity and vibrance of the display underneath.
- Anti-Glare Etched Glass: Premium tablets chemically etch the actual glass surface at a microscopic level. This provides superior, permanent drawing friction, never peels off, and preserves the crystal-clear sharpness of the 4K or 1440p LCD panel beneath it.
Workflow Enhancements and Ergonomics
A tablet should speed up your workflow, not slow it down. The physical design of the tablet exterior plays a huge role in your daily efficiency.
ExpressKeys, Dials, and Touch Strips
Most tablets feature a column of physical buttons on one side. These are “ExpressKeys,” and they are fully programmable. You can assign them to your most used keyboard shortcuts (e.g., Undo, Redo, Save, Brush Size up/down).
Having physical dials or touch rings is incredibly helpful for intuitively zooming in and out of your canvas or smoothly changing brush sizes without having to look at the keyboard. If you rely heavily on complex macros, ensure the tablet has enough buttons to accommodate your workflow, or consider buying a secondary wireless shortcut remote.
Connectivity: Cable Clutter vs. Wireless
If you are buying a non-screen Pen Tablet, look for one with built-in Bluetooth. Being able to sit on your couch with the tablet on your lap, entirely untethered from your desk, is a massive ergonomic relief.
If you are buying a Pen Display, pay attention to the cable situation. Older models required a massive, tangled “3-in-1” cable (HDMI, USB-A, and a Power brick). Modern Pen Displays increasingly support a single USB-C to USB-C connection. If your laptop or PC has a Thunderbolt/USB-C port that supports DisplayPort Alt Mode, you can power the screen, transmit the video signal, and send the pen data all through one single, clean cable.
Stands and Posture (Saving Your Spine)
Do not underestimate the physical toll of hunching over a screen tablet for eight hours a day. If you buy a medium or large Pen Display, you must invest in a robust ergonomic stand (or an Ergo Arm/VESA mount). You need the ability to pull the screen to the edge of your desk, angle it up to 60 degrees for drawing, and push it back to act as a standard monitor when typing. A cheap, flimsy stand that wobbles every time your pen touches the glass will ruin your drawing experience.
Matching the Tablet to Your Specific Design Discipline
Not all creatives need the same tools. Matching the tablet to your specific software and output is the secret to a smart purchase.
For Logo Designers and Vector Artists (Illustrator, CorelDRAW)
Vector work relies heavily on placing precise anchor points and manipulating bezier handles. It does not require massive, sweeping arm movements or extreme pressure sensitivity for shading.
- The Best Choice: A high-quality, Medium-sized non-screen Pen Tablet (like the Wacom Intuos Pro Medium). It is fast, efficient, saves desk space, and allows you to keep your posture straight while manipulating complex vector nodes on your main color-accurate monitor.
For Digital Painters and Concept Artists (Photoshop, Clip Studio Paint)
Painting requires an organic, paper-like connection. You need to see exactly how your brush strokes blend and build upon one another in real-time. You also need tilt recognition for broad shading.
- The Best Choice: A Pen Display (16-inch to 24-inch). The visual feedback of drawing directly on the screen is non-negotiable for high-end digital painting. Look for strong color accuracy and etched glass.
For Photo Retouchers (Lightroom, Photoshop)
Photo retouching (dodging, burning, frequency separation, masking) requires small, highly precise, repetitive wrist movements. You are generally looking closely at specific pixels rather than the overall composition.
- The Best Choice: A Small or Medium non-screen Pen Tablet. A massive tablet actually slows down a retoucher, as they have to move their arm too far to get from the tool palette back to the center of the photo. A small tablet mapped to a large, highly color-accurate monitor is the industry standard for high-end retouching.
For 3D Sculptors (ZBrush, Blender)
3D sculpting requires constant rotation of the model, masking, and adjusting brush depths. Pressure sensitivity is vital for determining how deeply you carve into digital clay.
- The Best Choice: A Medium Pen Tablet or a larger Pen Display. ZBrush relies incredibly heavily on keyboard modifiers (Alt, Ctrl, Shift). Therefore, many 3D artists prefer a non-screen tablet so they can keep one hand firmly planted on their mechanical keyboard while the other sculpts.
The Brand Landscape: Who Makes What?
The tablet market is no longer a monopoly. Understanding the tier list of manufacturers will help you align your budget with your expectations.
- Wacom: The undisputed industry heavyweight. Wacom has been making tablets for decades. Their Pro Pen 2 technology is flawless, their build quality is bomb-proof, and their drivers are incredibly stable. However, you pay a massive “Wacom Tax.” They are significantly more expensive than the competition. If you are a studio professional where downtime equals lost money, Wacom is still the safest, most reliable bet. (Flagship lines: Intuos Pro, Cintiq Pro).
- Huion: The ultimate disruptor. Over the last five years, Huion has closed the technology gap with Wacom remarkably fast. Their Kamvas line of pen displays offers laminated screens, battery-free pens, and excellent color gamut at often half the price of a comparable Wacom. They are the undisputed kings of the “value for performance” category.
- XP-Pen: Similar to Huion, XP-Pen offers incredible budget and mid-range options. Their Artist Pro series features excellent X3 smart-chip styluses that require a remarkably low initial activation force (meaning the pen registers a line even if you barely graze the screen). Excellent for students and freelancers.
- Apple: The iPad Pro, combined with the Apple Pencil 2 (or Apple Pencil Pro), offers arguably the best pure drawing experience on the market. The 120Hz ProMotion display means zero lag. However, you are locked into the iOS app ecosystem.
Budgeting: How Much Should You Spend?
To finalize your decision, you must set realistic expectations based on your budget.
- Beginner / Student Tier ($40 – $100): You can get excellent, basic non-screen tablets in this range. Brands like Huion and XP-Pen dominate here. They will have 8192 levels of pressure and get the job done beautifully for learning.
- Mid-Range / Enthusiast Tier ($200 – $600): This is where you find the professional non-screen tablets (like the Wacom Intuos Pro) and the excellent entry-level 13-inch to 16-inch Pen Displays from Huion and XP-Pen. This tier is perfect for freelance illustrators and graphic design professionals.
- Professional / Studio Tier ($1000 – $3000+): This tier features massive 24-inch to 32-inch Pen Displays with 4K resolution, etched glass, 99% Adobe RGB coverage, and heavy-duty ergo stands. These are the Wacom Cintiq Pros and top-tier Huion Kamvas Pros, designed for daily, grueling studio use where ultimate precision and color accuracy are required to meet client demands.
Conclusion
Choosing the best graphics tablet for design is not about finding the most expensive piece of hardware on the market; it is about finding the perfect extension of your own hand.
By analyzing your specific design discipline, understanding whether you prefer the ergonomic posture of a traditional pen tablet or the immersive experience of a pen display, and decoding specifications like LPI, pressure sensitivity, and color gamut, you can make a highly informed investment.
Whether you opt for the bulletproof reliability of Wacom, the incredible value of Huion or XP-Pen, or the mobile freedom of an iPad, making the leap to a graphics tablet will fundamentally change the way you create. It bridges the gap between the digital and the physical, allowing you to stop fighting with your hardware and get back to doing what you do best: designing incredible art.